Flutter Workshop
Flutter is a cross-platform, mobile development framework created by Google. With user-centric design in mind, Flutter allows developers to create beautiful native apps on iOS and Android from a single codebase.
Attending
No experience with Flutter, Dart, or mobile programming is necessary. And while not required, some experience with programming is recommended. Please follow the instructions below to install the necessary software prior to the workshop.
Getting Started
Flutter Installation
Follow the instructions found on the flutter website to get started. When asked to setup your environment, choose VS Code (as opposed to Android Studio).
Once the installation is complete, validate your setup by running flutter doctor in your terminal (Command Prompt / PowerShell on Windows) to ensure that everything is up and running.
Your output should look something like this:
[✓] Flutter (Channel beta, v1.0.0, on Mac OS X 10.14.2 18C54, locale en-US)
[✓] Android toolchain - develop for Android devices (Andr
[✓] iOS toolchain - develop for iOS devices (Xcode 10.1)
[✓] Android Studio (version 3.1)
[✓] VS Code (version 1.30.2)
[✓] Connected device (1 available)
Installing an Emulator
Flutter allows you to install your applications directly onto physical hardware using flutter run. However, if you don’t have a device that you can use, you can install an emulator relatively easily.
Android
- Install and run Android Studio
- Go to Tools -> AVD Manager -> Create Virtual Device and configure your emulator
iOS (macOS only)
- Install and run Xcode
- Go to Preferences -> Components and choose the emulator you would like to install
Running the Emulator
To list all availabe emulators, run flutter emulators. Your output should look something like this:
2 available emulators:

Pixel_2_XL_API_28   • pixel_2_xl    • Google • Pixel 2 XL API 28
apple_ios_simulator • iOS Simulator • Apple

To run an emulator, run 'flutter emulators --launch <emulator id>'.
To create a new emulator, run 'flutter emulators --create [--name xyz]'.

You can find more information on managing emulators at the links below:
  https://developer.android.com/studio/run/managing-avds
  https://developer.android.com/studio/command-line/avdmanager
To launch an emulator, run flutter emulators --launch <emulator_id>.
Basic Flutter Terminal Commands
flutter doctorvalidates Flutter setupflutter create <app_name>creates a new Flutter projectflutter emulatorslists all availabe Flutter emulatorsflutter emulators --launch <emulator_id>launches a Flutter emulatorflutter runruns a Flutter application in Debug ModeRwhile running app performs a full app restartrwhile running app performs a hot reload
flutter run --releaseruns a Flutter application in Release Mode (physical devices only)flutter cleandeletes all Flutter build files
Slides & Code
The presentation slides and code can be found on GitHub.
Lab
The lab can be found on GitHub.
Getting Started
Run flutter create weatherviewer and open your project in VS Code.
Alternatively, you can clone this repository to download the boilerplate code by running:
git clone https://github.com/akshathjain/FlutterWorkshopcd FlutterWorkshop/weatherviwer_boilerplate
Overview
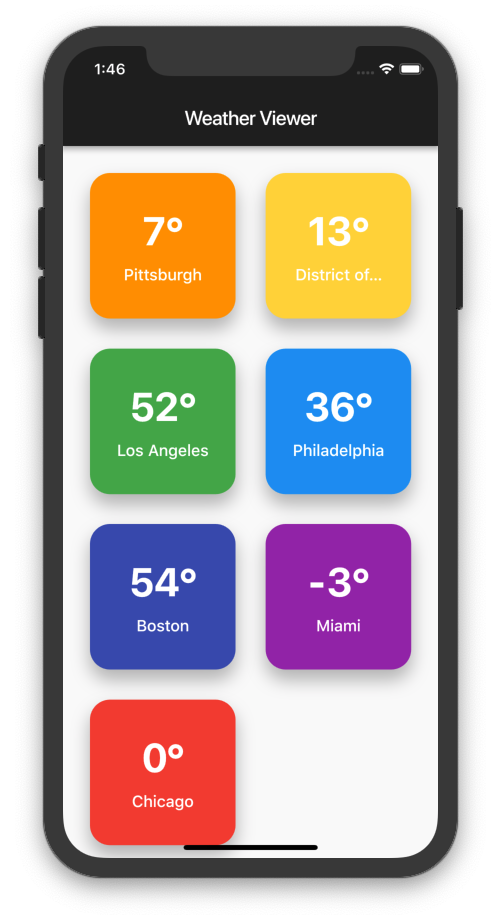
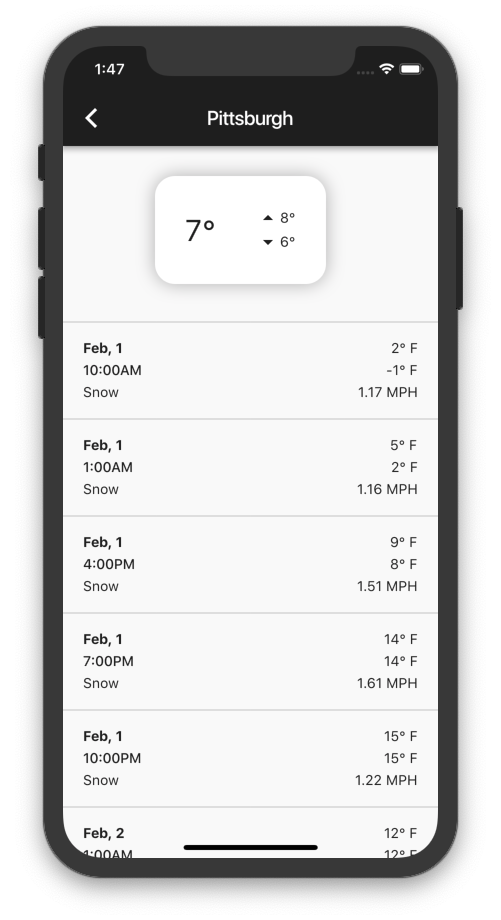
In this lab, you will be creating a simple Weather app using Flutter. Using skills covered during the presentation, your app should be able to:
- Fetch weather data from the internet
- Display weather across several cities
- Show the forecast for the next few days
This project is fairly open-ended, so feel free to design your app however you wish! Screenshots and code from a sample WeatherViewer are provided if you get stuck, or need to reference any components. If you have any questions, feel free to contact any of the TAs for help.
Good luck, and have fun!
Fetching Data
The data you will be using is sourced from the OpenWeatherMap API. However, instead of fiddling with API Keys and rate limits, a sample JSON file is available at https://akshathjain.com/FlutterWorkshop/json/weather_info.json. Treat that as your “API” for the purposes of this lab. Although, you’re definitely more than welcome to try and use the real thing!
Screenshots

